Tibbo > Linux Ecosystem > Node.JS API > Simple Card-based Access Control
Simple Card-based Access Control
About the Application
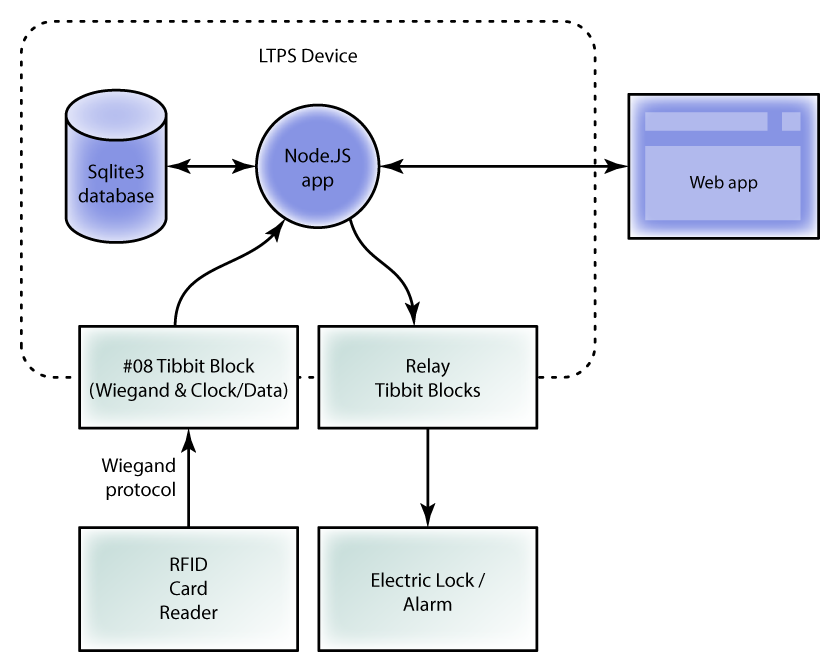
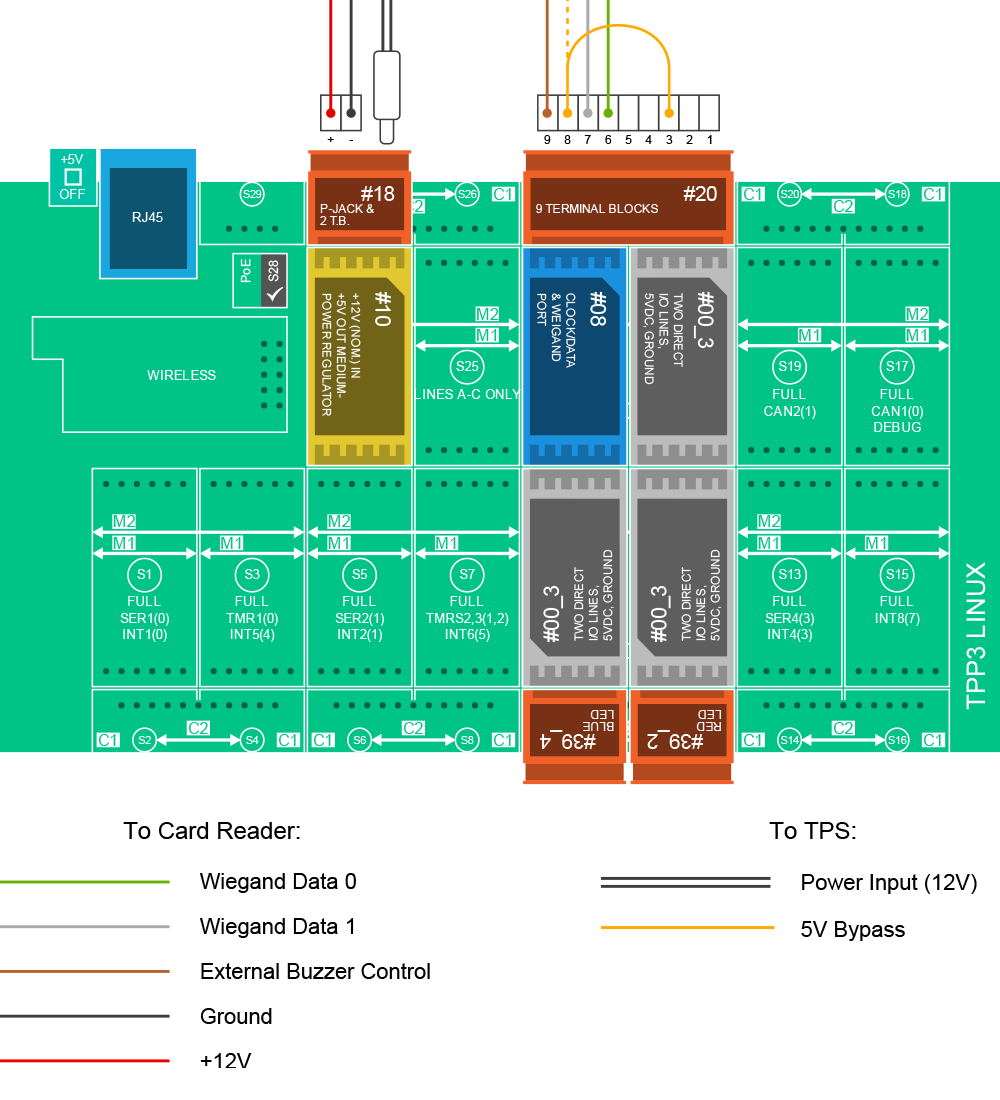
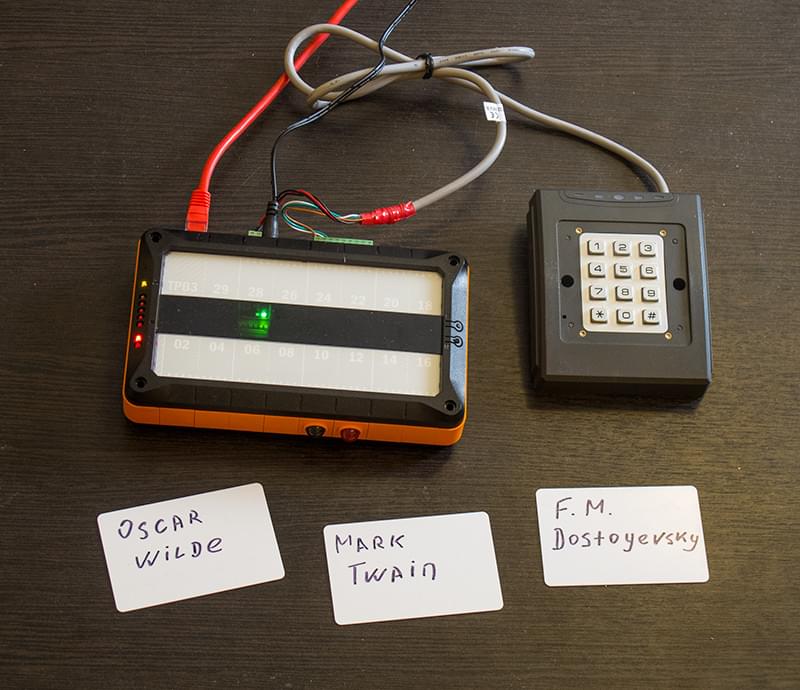
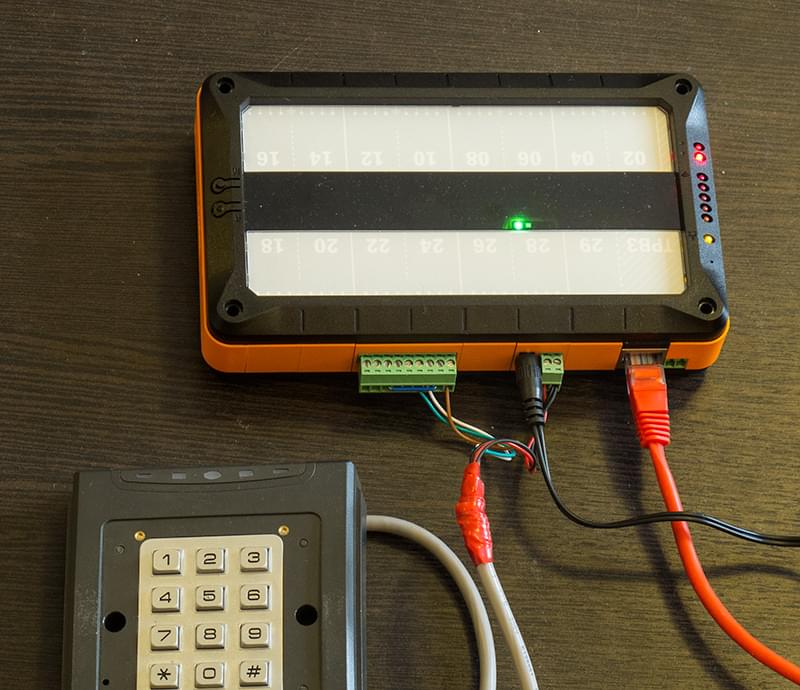
This project implements a very simple access control device. The LTPS is equipped with Tibbit #08
(Wiegand and clock/data interface) and receives card codes from an external RFID card reader.
The project allows you to enroll "users", i.e. save user names and their ID codes into the database, and then
verify the cards you read against existing database records. If you read a card and its ID code matches any ID code from the database, the terminal
"grants access" (turns the blue LED on). If this ID code is not in the database, the terminal "denies access" (turns the red LED on).
Although extremely simple, this project demonstrates all key techniques that are essential to building access control solutions with LTPS.
Other notable features of this project:
- The project uses a full-featured embedded SQLite SQL database engine.
- The web interface displays card reader events in a real time.
What you need
Hardware
* In this test arrangement blue and red LED Tibbits are used to indicate "Access granted" and "Access denied".
On-board Software
- Node.js V6.x.x (pre-installed during production)
- SQLite database engine for storing cardholder's info and events
Node.js Application
- The app uses the sqlite3 module as a persistent event and cardholder data store. The module is a self-contained, serverless SQL database engine that does not require any other software to be installed on the device.*
- Express and socket.io are used to support web interface functionality.
* The module is written in C++. During the app installation, a precompiled version will be installed from Tibbo's GitHub. In case you want to install the module from NPM, build-essential must be installed on the device as well.
Configuration and Installation
- Define the required configuration in the LTPS Web Interface
- Login to the LTPP3 board from the SSH client
- Install NPM and other tools as needed. Git-perltools are required to install the precmpiled sqlite3 module from GitHub.
- Install the app:
git clone https://github.com/tibbotech/wiegand-demo.git
cd wiegand-demo
npm install .
- Launch a simple app called app0 :
node app0
- Read an RFID card. Its binary code should be printed in the console.
- Stop app0
- Launch the main app:
node app
Web Client
The web interface has three tabs:
1. Add a user tab
To enroll a user:
- Click READ CARD
- Read a card, and the ID code from this card will appear in the User ID field
- Manually fill in the First Name and Last Name fields
- Click ADD USER to create a new record in the database

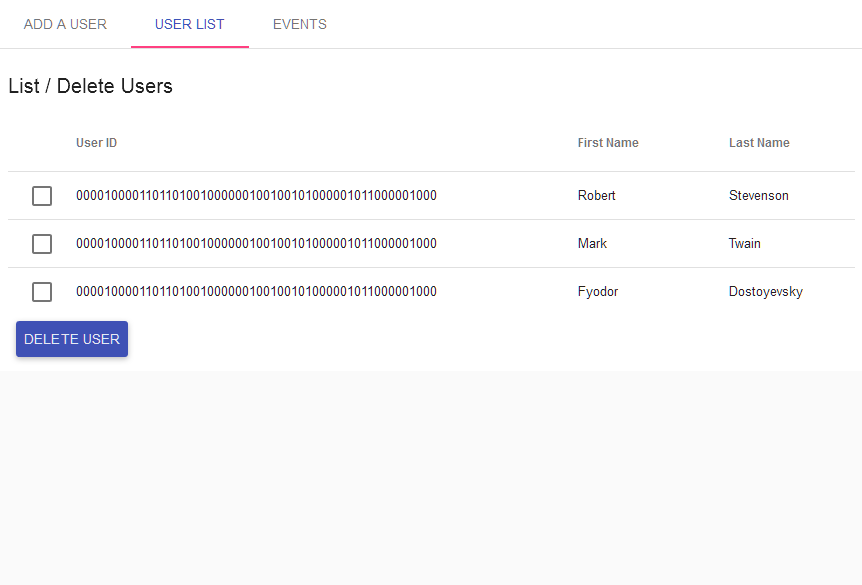
2. User List tab
This tab displays all the records you've created. It also allows you to delete user records.
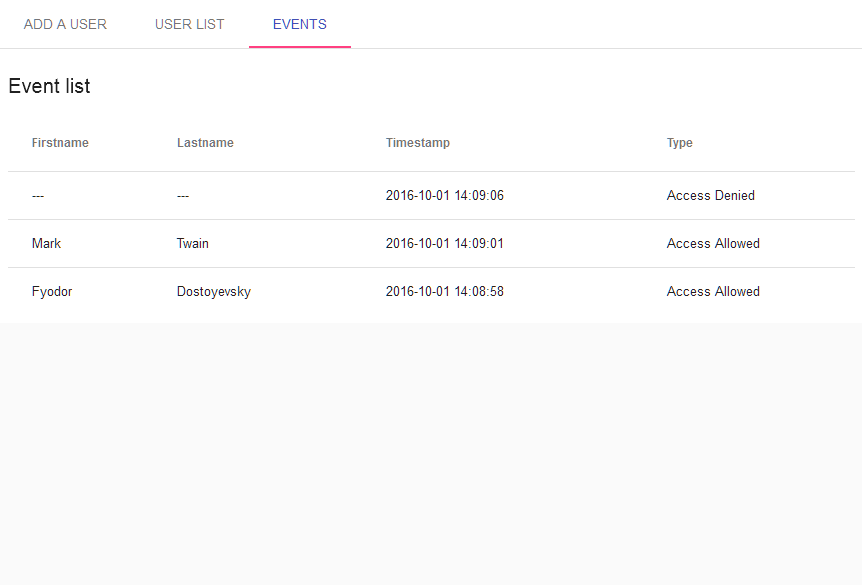
3. Events tab
This tab displays access control events in real time.